Building and Programming
Home -> Teaching -> CSAS 3085/PSYC 3698 -> Building and Programming
Content
Content to be added soon - but please check out the following robot videos:
The Lego Mindstorm NXT kit which was introduced in August 2006 as an upgrade of the previous RCX kit. It can be used to construct a multitude of robots and includes a microprocessor to control the machine you built. You can program it in many languages, including Java, a modern, relatively simple programming language.
 The brain of this kit is the
NXT Intelligent Brick (“Brick”). As for the technical information: it has a 32 bit
ARM processor running at 48MHz, with 64KB of RAM and 256 KB of flash memory. It also
has a separate 8 bit AVR processor, running at 8 MHz, to control the servo motors and
rotation sensors to guarantee the accuracy of the motor operations. It includes three
ports for independently controlling motors and sensor ports to connect up to four sensors.
The brain of this kit is the
NXT Intelligent Brick (“Brick”). As for the technical information: it has a 32 bit
ARM processor running at 48MHz, with 64KB of RAM and 256 KB of flash memory. It also
has a separate 8 bit AVR processor, running at 8 MHz, to control the servo motors and
rotation sensors to guarantee the accuracy of the motor operations. It includes three
ports for independently controlling motors and sensor ports to connect up to four sensors.
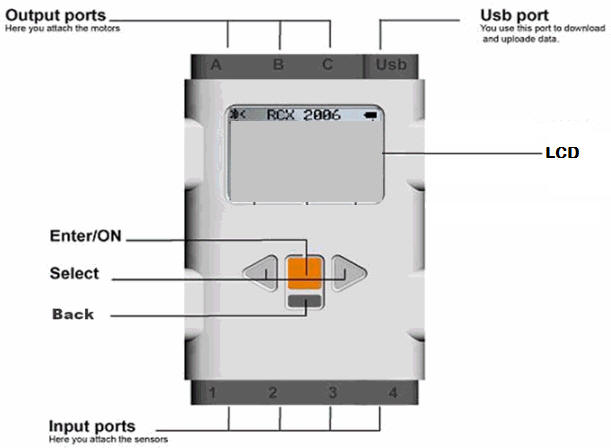
A simpler way to think about the brick is as a mini computer without a keyboard, but with three motor ports, labeled A, B, and C, and four sensor ports, labeled S1, S2, S3, and S4. As a “window” of its mind, it has a small monochrome LCD screen, together with four buttons to allow you to make various choice. p>
Since the brick does not include a keyboard, we need to program it using a PC. Once a program, or a set of instructions, is complete, we can download it from the computer to the Brick usually using a USB cable. The brick then execute the instructions on its own.
Besides the brick, the NXT kit also comes with 400+ Lego pieces, three servo motors, and several sensors:
 .
.
Besides these sensors supplied with the NXT kit you can purchase additional ones such as a compass sensor, color sensor, acceleration Sensor, etc. from different vendors. In addition to the "brick" and the sensors there are several hundred parts that you can use to build concrete robots. The picture below shows some of them, and the number of copies of each part.
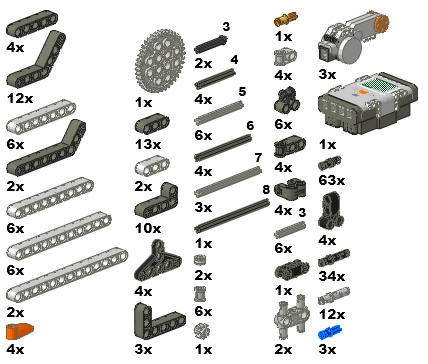
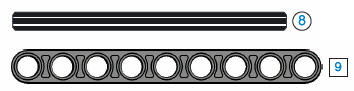
They are neatly organized in a convenient carrying case, including labels for each compartment that show which parts go in what spot. Note: many Lego parts are measured in "holes" instead of inches or cm. For example, in the picture below the axle is a "size 8" whereas the beam is a "size 9".
All parts are very cleverly designed to fit together well if you just combine the correctly-sized parts. There are many detailed plans available for how to combine parts to build a particular machine or robot, but you can just try to come up with your own ideas. However, for your first robot you probably do want to follow some blueprint, so tat you can get the hang of it without getting stuck early.
Another important part of your kit is the charger. In order for the brick to operate, it is equipped with a rechargeable battery: make sure your battery is fully charged by using the electric charger. When you plug it in, a red light will glow. When the battery is fully charged, the light will turn green.
First you should experiment with a few parts to see how the fit together.
Exercise: Build a square or a rectangle with straight beams, right-angle beams, and the little black connectors.
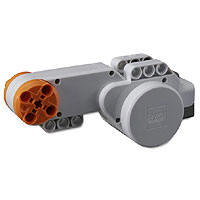
Next you should explore the actuators, or motors. The kit comes with three of them. Each motor needs to be connected to one of the brick's motor ports labeled A, B, and C. A motor can rotate forwards or backwards at different speeds and has a build-in rotation sensor that measures how many degrees a motor has rotated (with one-degree accuracy). You connect a motor to a port using one of the flat, black wires with the standard connectors on each side. As usual, everything should fit together easily. To engage a motor, i.e. to activate an actuator, you need to write an appropriate program, which we will do later. For now:
Exercise: Hook up a motor to one of the motor ports of the brick.
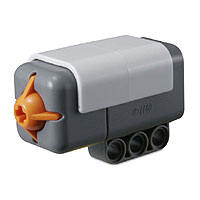
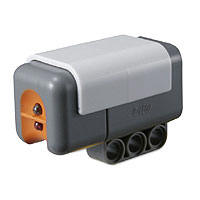
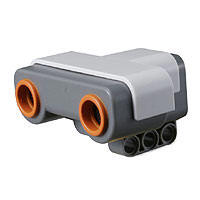
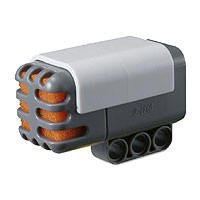
Let's move on to the sensors: touch, light, sound, ultrasound, and compass. A sensor connects to one of the sensor ports labeled 1 to 4 via the same cable you would use for the motors so that a robot can have up to four sensors (you could purchase additional parts that would allow you to extend the number of ports, but that's not in your kit).
Exercise: Hook up the touch sensor to port 1 and the light sensor to port 2 of the brick.
To activate the sensors and to monitor or react to their input (or output depending on your point of view) requires some programming, which we will do later in detail. For now:
Exercise: Your brick should now have a motor connected to port A, a touch sensor to port 1, and a light sensor to port 2. Given that construction, describe in your own words what you think the following program would make your "robot" do:
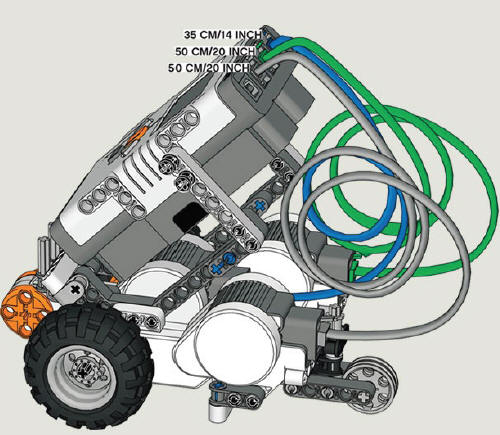
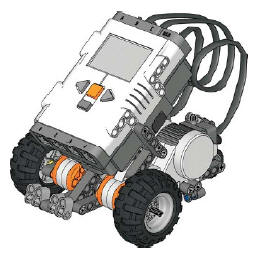
Now let's move on to a 'real' robot: we will be building a 3-wheeled car-like mobile robot called in technical terms a "differential drive" robot. A differential drive robot is a robot with two motorized wheels that can be controlled independently and that allow your robot to:
Such a differential drive robot can easily be equipped with different sensors and will be the basis for many of our experiments. I have included some detailed plans for two different differential drive model. The first is called "TriBot" and is straight-forward. The alternate is a "TaskBot" and is a little more complicated to put together, but uses only two of our three motors, leaving one available for additional construction. The construction plans are given as PDF files that are - hopefully - easy to follow:
NXT TriBot
TriBot construction planNXT TaskBot
TaskBot construction plan
(they require some modifications)
The NXT kit comes with its own programming software, where you can create programs by visually connecting icons together without having to type any instructions. That type of programming is very easy to learn, but is limited: complex programs require a more flexible approach. You can, in fact, program the NXT in many different programming languages, including Java, a modern, very flexible and widely adapted language developed by SUN Microsystem that still is relatively easy to learn. Thus, we will choose Java as our programming language.
Since the that language does not come with the NXT kit, you will need to download and install a number of software pieces that in the end will all work together to allow the easy creation of NXT programs in Java.
Installation and setup of the Java software is rather technical and you should seek the help of a "qualified instructor" to perform this step for you (or at least with you). Please make an appointment with me, bring your laptop, and I will setup everything with you.
However, for the fearless and technically savvy folks, or for those who can't make an appointment with me, here are some very detailed instructions for how to setup the software yourself.
Bert G. Wachsmuth
Last modified:
10/06/09